
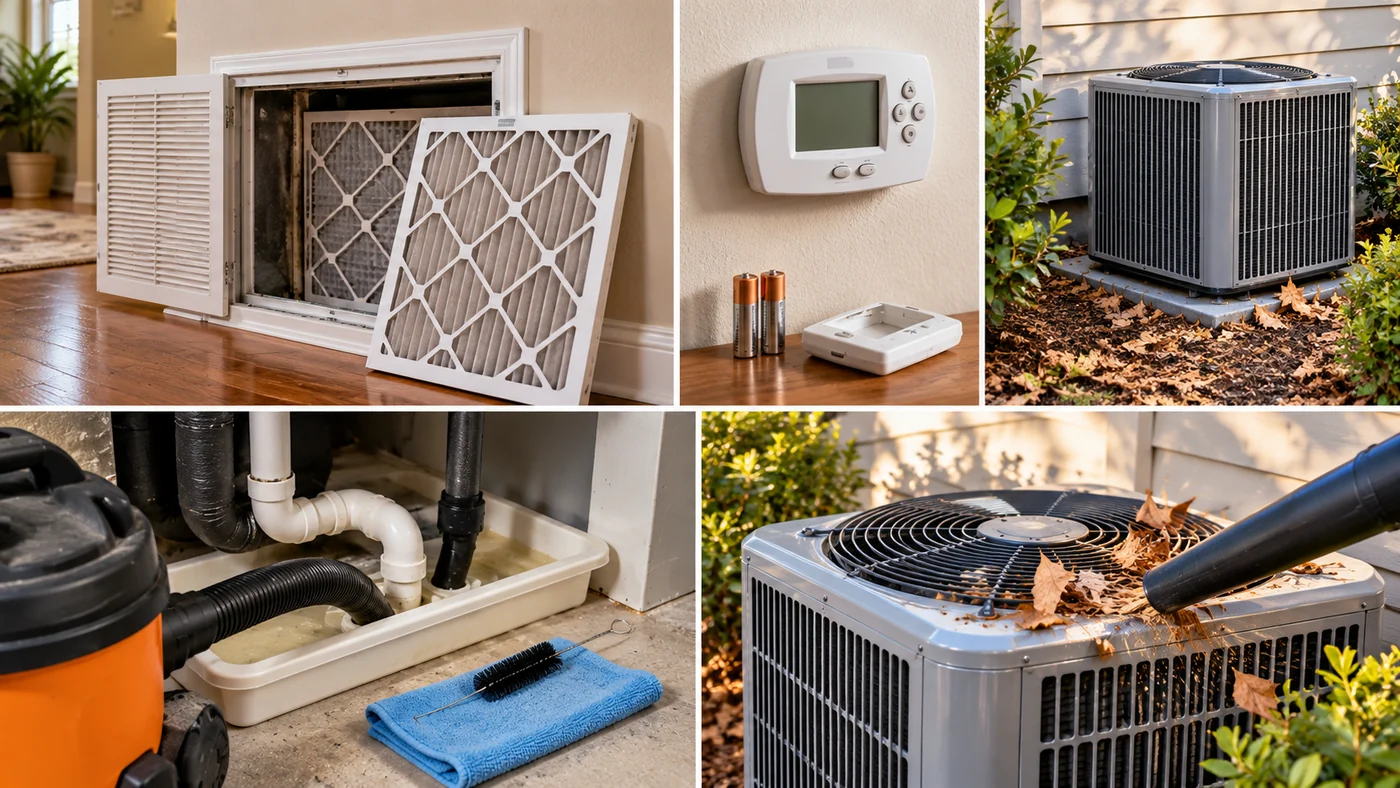
Start with the simple things. Manufacturers such as Carrier and Trane specifically point homeowners toward filter changes, thermostat checks, clearing registers and keeping the outdoor unit free of debris before scheduling service. Those steps are low-cost, often solve real comfort problems, and do not require opening high-voltage equipment.
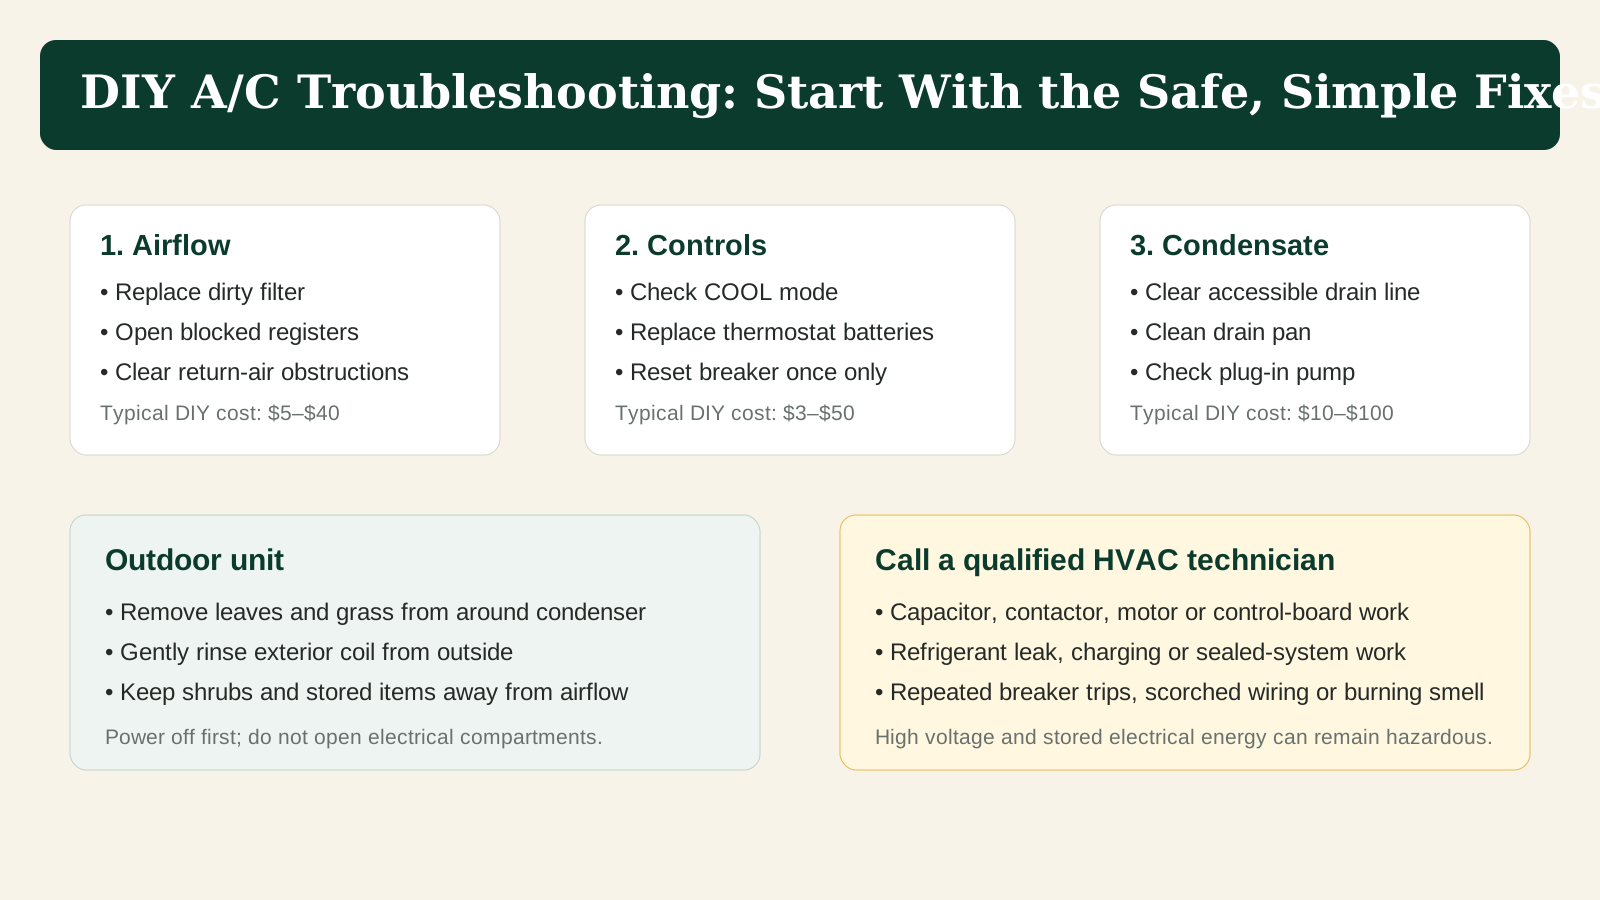
Quick Diagnosis: Symptom to First Check
| Symptom | First DIY checks | Possible DIY cost | Call a pro when… |
|---|---|---|---|
| System will not run | Thermostat mode/setpoint, thermostat batteries, service switch, breaker | $3–$15 | Breaker trips again, wiring smells hot, or equipment hums without starting |
| Runs but weak airflow | Filter, return grille, closed registers, visible obstructions | $5–$40 | Blower is noisy, coil repeatedly freezes, or airflow remains weak |
| Water near indoor unit | Accessible condensate drain, drain pan, pump reservoir | $10–$100 | Pan is rusted through, pump is hardwired, drain repeatedly clogs, or water reaches electrical parts |
| Outdoor unit overheats / shuts down | Clear leaves and vegetation; gently clean exterior coil surface | $0–$20 | Fan does not run, compressor buzzes, breaker trips, or coil is physically damaged |
| Air is not cold | Filter, thermostat, outdoor airflow, frozen coil check | $0–$40 | Ice returns, refrigerant lines frost, compressor will not start, or temperature split is abnormally low |
1. Replace a Dirty Air Filter
A clogged filter restricts airflow, raises system pressure drop and can contribute to weak cooling or an iced evaporator coil. This is the first thing to check when airflow falls off.
What to do
- Turn the system off at the thermostat.
- Locate the filter at the return grille or air-handler/furnace filter slot.
- Confirm the exact size printed on the old filter.
- Install the new filter with the airflow arrow pointing toward the blower/air handler.
- Restore cooling and verify airflow.
Typical part cost
Common 1-inch pleated filters currently range from roughly $5 to $24 each depending on size and filtration level. A 20×20×1 MERV 8 filter, for example, is commonly around $5–$6 each in multipacks; higher-MERV single filters can run $15–$24.
Do not automatically choose the highest MERV rating. Some systems are not designed for the added resistance of very restrictive filters. Use the filter range permitted by the equipment manufacturer.
3. Reset a Tripped Breaker — Once
A breaker can occasionally trip from a temporary event. If the indoor air handler or outdoor condenser breaker is tripped, move it fully to OFF and then back to ON once.
Cost: $0 for a one-time check. If a breaker itself is defective or an electrical problem is present, use an electrician or HVAC technician rather than replacing high-voltage components as a trial-and-error DIY repair.
4. Clear an Accessible Condensate Drain
Central A/C systems remove moisture from indoor air. That water drains away through PVC tubing or, in some installations, through a condensate pump. Algae, sludge and debris can clog the drain and trigger a float switch that shuts the system off.
DIY-friendly method
Use the thermostat and follow the equipment manual before opening any condensate cleanout.
Locate the PVC line outside or at an approved drain location.
Seal the vacuum hose around the drain outlet and pull for a minute or two to remove sludge.
Only open fittings designed for service; reinstall caps securely.
Standing water or visible slime indicates a drainage problem that needs attention.
After cleaning, confirm water flows to the proper termination and does not leak around fittings.
Typical cost
If you already own a wet/dry vacuum, the cost may be zero. Drain brushes, tubing and cleaning accessories often cost $5–$25. Condensate-pan treatment tablets can run around $30 for a large bottle; use only products permitted by the equipment manufacturer.
5. Clean Around the Outdoor Condenser
The outdoor condenser needs free airflow. Leaves, cottonwood fluff, grass clippings, vines and stored items can block the coil surface and make the unit run hotter.
Safe exterior cleaning
- Turn the system off before cleaning.
- Remove loose leaves and debris from around the cabinet.
- Maintain clear space around the unit according to the manufacturer’s installation instructions.
- Use a gentle garden-hose rinse on the outside surface if the manufacturer allows it.
- Avoid pressure washers, which can flatten delicate coil fins.
- Do not remove panels to clean near high-voltage components.
Typical cost: $0–$20 if you already have a hose and soft brush.
7. A/C Capacitor Problems: What a Homeowner Should Know
The run capacitor is a common failure point in many central air-conditioning systems. It helps the compressor and/or condenser-fan motor start and run efficiently. A weak or failed capacitor can make an otherwise healthy outdoor unit appear completely dead.
Common signs of a failing capacitor
- The outdoor unit hums but the fan or compressor does not start.
- The condenser fan starts slowly, runs intermittently or stops unexpectedly.
- The system has trouble starting on hot days.
- The breaker trips when the outdoor unit attempts to start.
- The capacitor case is visibly swollen, bulged or leaking.
What the part usually costs
A replacement single-run or dual-run capacitor is often only about $20–$50 for the part itself, depending on capacitance, voltage rating, manufacturer and whether an OEM part is required. Professional capacitor replacement commonly costs roughly $100–$400 once diagnosis, labor, service-call charges and the correct replacement part are included.
What you can safely do yourself
- Turn the system off if the outdoor unit is humming, repeatedly trying to start or tripping a breaker.
- From outside the closed cabinet, listen for unusual humming or repeated start attempts.
- Note whether the condenser fan is running when the thermostat is calling for cooling.
- Give the technician the equipment model number and describe exactly what the system is doing.
- Ask whether the quoted repair includes diagnosis, the capacitor, labor and any service-call charge.
If a technician confirms capacitor failure, the repair is usually relatively quick and far less expensive than a compressor replacement. Similar symptoms can also come from a failed contactor, motor, wiring problem, control fault or compressor issue, so accurate diagnosis matters.
8. Deal With a Frozen Evaporator Coil the Right Way
If you see ice on the refrigerant line or indoor coil area, shut cooling off. Running the system while iced can worsen the problem.
What you can safely do
- Turn cooling off and allow the ice to melt completely.
- Replace a visibly dirty air filter.
- Make sure returns and supply registers are open.
- Check that the condensate drain can handle the meltwater.
After the coil is fully thawed, you can restart the system once. If it freezes again, call a technician. Recurring ice can be caused by low airflow, a blower fault, a refrigerant leak, metering-device trouble or another problem that cannot be diagnosed safely from the outside.
9. Check a Plug-In Condensate Pump
Some air handlers, furnaces and mini-split installations use a small pump to move condensate to a drain. If the pump plugs into a standard receptacle and the reservoir is accessible without entering electrical equipment, basic checks are reasonable.
- Confirm the plug has power.
- Check tubing for kinks.
- Clean visible sludge from an accessible reservoir following the pump manual.
- Test the pump using the manufacturer’s procedure.
A typical small condensate pump is roughly $60–$100 at current retail pricing, with some OEM-specific pumps costing much more. A commonly sold Little Giant 115-volt model is currently around $78.
If the pump is hardwired, connected to a safety circuit you do not understand, or located inside equipment, call a professional.
Typical DIY Parts and Supply Costs
| Item | Typical DIY price range | Difficulty | Notes |
|---|---|---|---|
| 1-in. pleated air filter | $5–$24 each | Easy | Match exact size and appropriate MERV rating. |
| Thermostat batteries | $3–$10 | Easy | Often solves blank or erratic battery-powered thermostat displays. |
| Basic thermostat | $25–$50+ | Moderate | Compatibility matters; more complex HVAC systems may require professional setup. |
| Programmable/smart thermostat | $50–$250+ | Moderate | Check C-wire, heat-pump and staging requirements. |
| Condensate drain brush/tubing | $5–$25 | Easy | For accessible drain cleanouts only. |
| Condensate pan tablets | About $30 per bottle | Easy | Use only if permitted by the equipment manufacturer. |
| Plug-in condensate pump | $60–$100 typical | Moderate | OEM pumps can cost substantially more. |
| Replacement supply register | $10–$30 | Easy | Size must match duct opening. |
| Wet/dry vacuum | $40–$150 if needed | Easy | Useful for pulling debris from a condensate drain outlet. |
Parts That Look Cheap but Are Not Good DIY Repairs
One reason A/C repair can be misleading is that the raw replacement part may be inexpensive while the diagnosis and installation are hazardous.
| Part | Typical retail part-only example | Typical professional repair range | Why not DIY |
|---|---|---|---|
| Dual-run capacitor | Often roughly $20–$50; one OEM-style example is about $24 | About $100–$400 | Can store dangerous electrical energy even after disconnecting power; wrong capacitance can damage motors/compressor. |
| Contactor | Often roughly $25–$60; one example is about $37 | Often similar to other electrical service calls; diagnosis varies | Inside high-voltage cabinet; failure can be confused with control, capacitor or compressor faults. |
| Fan motor | Varies widely | About $200–$700 | High voltage, rotating equipment, matching horsepower/rotation/capacitor requirements. |
| Control board | Varies widely | About $75–$600 | Diagnosis requires electrical testing; a board may be damaged by another fault. |
| Refrigerant / leak repair | Not a normal consumer DIY part | Varies significantly | Sealed-system work requires specialized tools and regulated refrigerant handling. |
DIY Savings Potential at a Glance
This chart compares the approximate out-of-pocket cost of simple homeowner fixes with the kind of professional repair bill they may help you avoid when the simple issue really is the cause. It is illustrative—not a guarantee of savings.
Generic Homeowner Review Themes
Across homeowner forums, retailer reviews and HVAC troubleshooting discussions, a few ownership patterns show up repeatedly. These are anecdotal themes, not controlled product testing.
Filters are the most overlooked fix
Owners frequently report weak airflow or icing that improves after replacing a severely loaded filter. The recurring lesson is to check airflow before assuming the compressor has failed.
Condensate clogs create confusing shutdowns
Float switches can make an otherwise functional system appear dead. Homeowners are often surprised that clearing the drain restores operation.
Thermostat batteries cause “mystery” failures
Blank screens and intermittent operation are sometimes resolved by a few dollars’ worth of batteries rather than an HVAC service call.
Outdoor debris matters in long cooling seasons
Leaves, grass and airborne debris accumulate gradually, so performance loss may be subtle until the condenser is visibly blocked.
Cheap electrical parts invite risky DIY attempts
Owners often focus on the low part price of capacitors or contactors. The more important issue is safe diagnosis and installation around stored energy and line voltage.
Repeated faults usually mean the easy fix was not the root cause
If a breaker trips twice, a coil freezes again or a drain repeatedly backs up, stop treating the symptom and have the system properly diagnosed.
When to Call an HVAC Professional Immediately
- Breaker trips again after one reset.
- Burning smell, scorched wiring, arcing or melted insulation.
- Outdoor unit hums but compressor or fan does not start.
- Capacitor appears swollen or leaking.
- Refrigerant line or evaporator coil repeatedly ices.
- System loses cooling gradually with no airflow restriction.
- Water is entering electrical compartments or damaging ceilings/walls.
- Fan motor, compressor, control board or contactor diagnosis is required.
- Any refrigerant leak, recovery, evacuation or charging work is needed.
- You are not certain which disconnect, breaker or component you are working around.
Maintenance That Prevents DIY “Repairs” Later
| Task | Practical schedule | Why it helps |
|---|---|---|
| Inspect filter | Monthly during heavy use | Prevents airflow restriction and catches unusual dust loading. |
| Replace filter | As needed per filter/system instructions | Protects blower and coil while maintaining airflow. |
| Clear condenser perimeter | Seasonally and after storms/yard work | Maintains outdoor airflow. |
| Inspect condensate drain | Before and during cooling season | Reduces overflow and float-switch shutdown risk. |
| Test thermostat | At seasonal changeover | Catches weak batteries and programming errors. |
| Professional maintenance | Usually annually; more often for long cooling seasons | Allows electrical, refrigerant and mechanical checks homeowners should not perform. |
The Bottom Line
The best DIY A/C repairs are the ones that stay outside the dangerous parts of the system: filters, thermostat settings and batteries, accessible condensate drainage, registers and exterior condenser airflow. Those fixes are inexpensive, genuinely useful and recommended as first-line troubleshooting by major HVAC manufacturers.
Before You Start
- Read the equipment manual.
- Use the thermostat to stop cooling before basic maintenance.
- Never open a high-voltage compartment just because a replacement part looks inexpensive.
- Reset a breaker only once.
- If the easy fix does not hold, stop and diagnose the root cause professionally.
Related Home Improvement Guides
Research Sources & Methodology
This article cross-checked manufacturer troubleshooting guidance and current parts/retail pricing available in September 2026. Prices vary by region, size, model, promotion and availability. Contact the manufacturer or an authorized dealer for current part pricing and compatibility.
- Carrier — Air Conditioner Repair Guide
- Carrier — AC Capacitor Safety and Cost Guidance
- Trane — HVAC Repair Guide for Homeowners
- Trane — Central Air Conditioner Repair Cost
- Major retailer — Representative air-filter pricing
- Major retailer — Condensate pan treatment pricing
- Major retailer — Plug-in condensate pump pricing
- Repair parts reference — Example capacitor and contactor part-only pricing
Editorial note: HVAC systems vary substantially. This guide describes homeowner-level troubleshooting, not system-specific service instructions. Electrical and refrigerant repairs should be performed by appropriately trained professionals.