
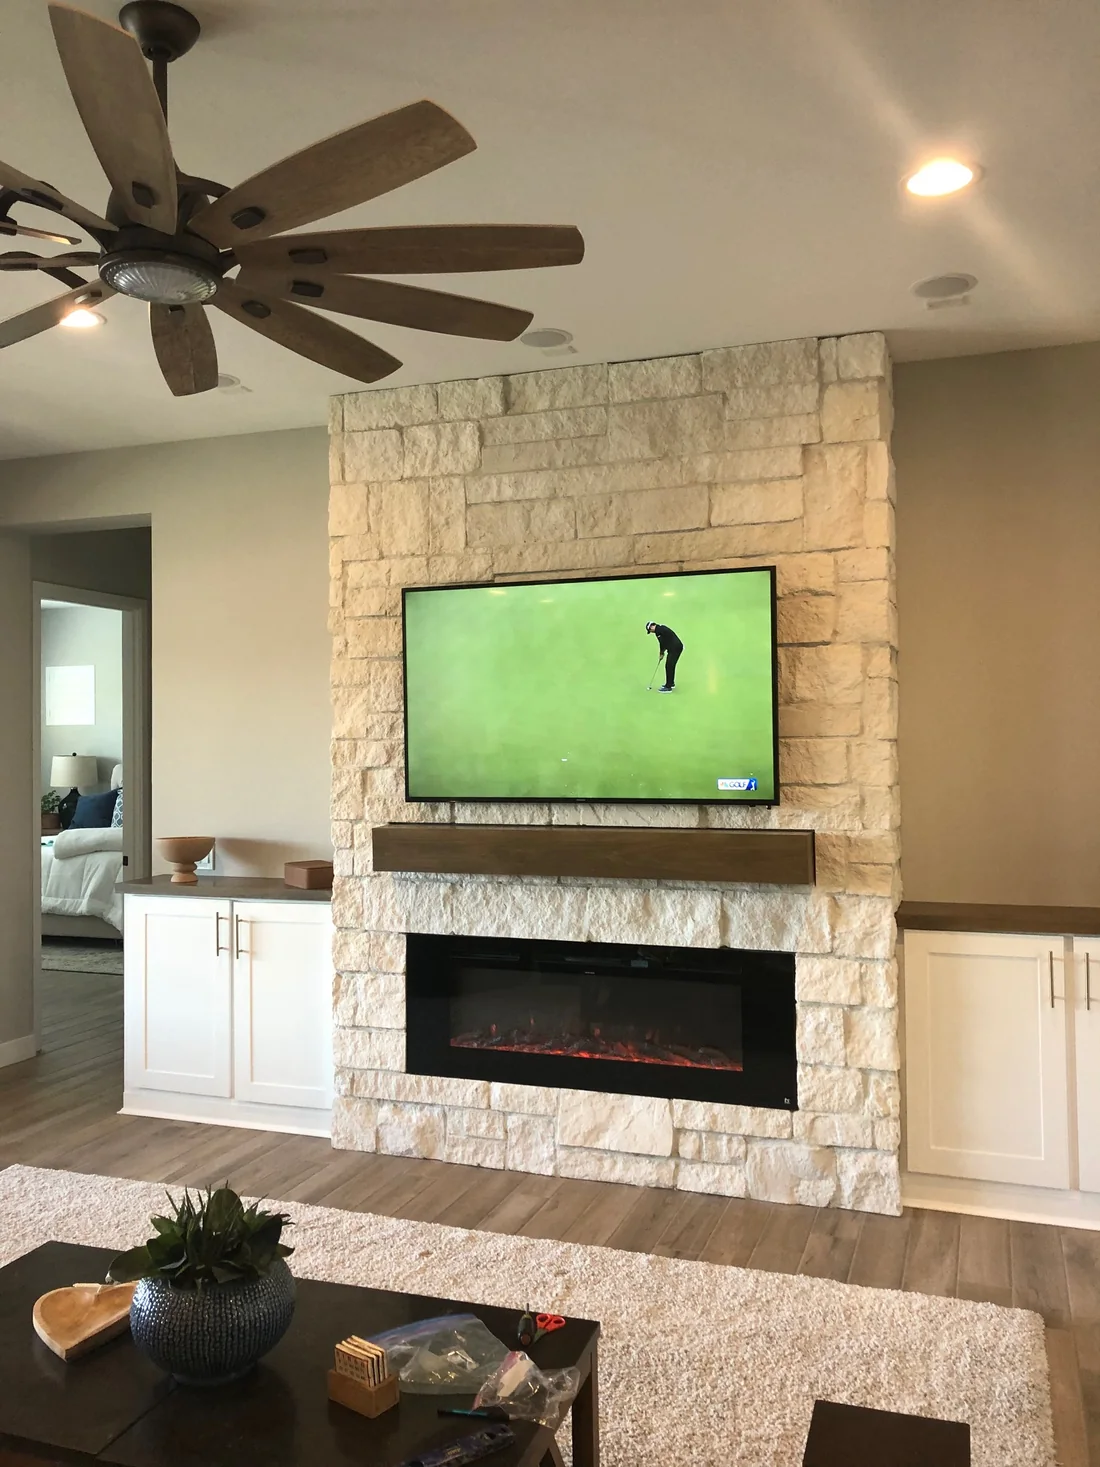
This custom fireplace cabinet project transforms a plain living-room wall into a built-in electric fireplace feature with integrated cabinetry, a TV, stone veneer and a floating mantel. The photos below follow the DIY fireplace wall from the initial layout through 2x4 framing, cement backer board, natural stone installation, grouting, cabinetry and the finished fireplace surround.
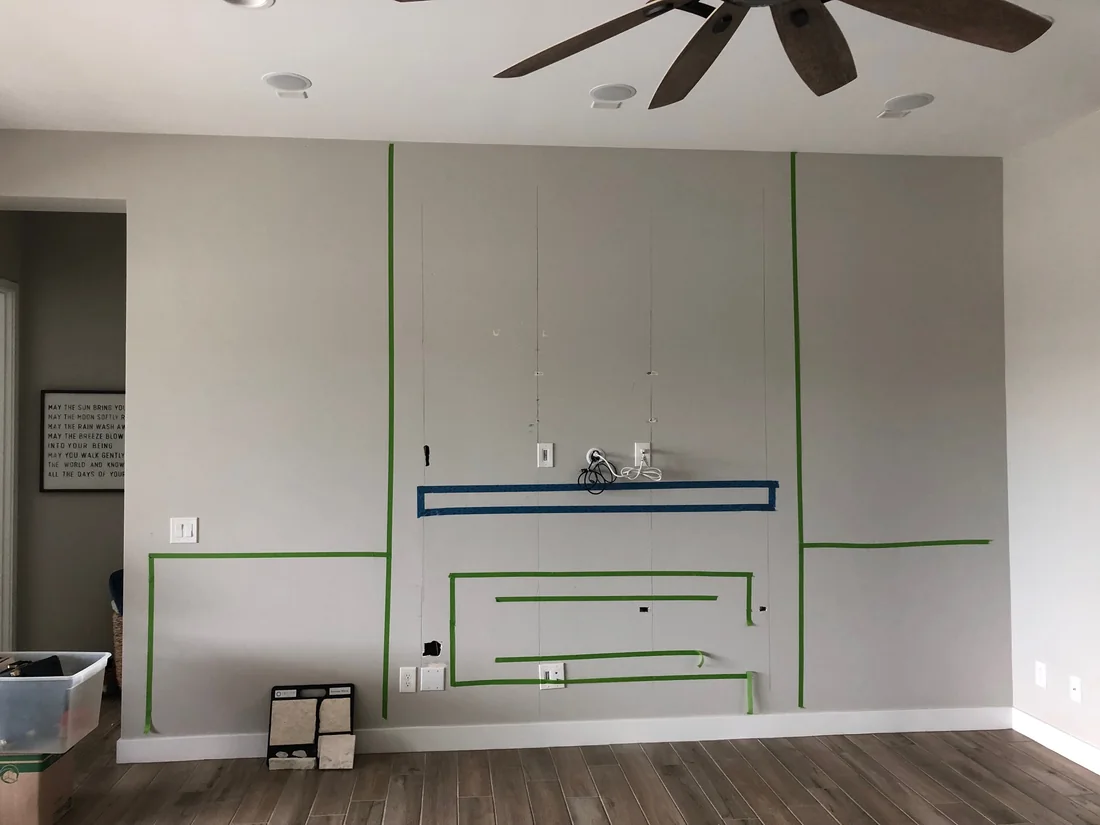
Plan the Wall and Lay Out the Project
Prior to any of this being done, make sure to purchase the desired fireplace, since its dimensions will directly affect the framing of the wall structure and the overall layout of the project. We selected a model from Touchstone Home Products that measured approximately 5 feet wide by 22 inches high. Electric fireplaces come in many shapes and sizes, and we wanted one with a more linear profile. Also give some thought to how high you want to mount the fireplace, along with the placement and dimensions of other elements such as the mantel and, if applicable, the television.
Scope out the desired layout on the wall by marking all the dimensions with tape. In this case, our wall was about 15 feet wide by 10 feet tall. Make sure to lay out the fireplace opening in the center of the wall. Verify the location of your electrical source for the fireplace. Ours fit well within the width of the proposed structure. Plan how you will access the outlet after the project is complete. Since we were planning cabinets on either side of the fireplace, we needed a hidden opening on the inside of one cabinet. In addition to providing access to the electrical outlet, the opening also gives us a convenient place to visually inspect the inside of the completed structure.

Build the Main Framing Assembly
Now the work begins. I started by building the frame in sections. In our case, it was important to create a frame capable of supporting a substantial amount of stone. We selected a natural Texas limestone that was very heavy. Because we did not have any time constraints, I was able to build each section in the garage and install it later. The frame was constructed from standard Douglas fir 2x4s. Each section was carefully laid out to allow for the fireplace and TV openings, while also providing a strong structural area for mounting the mantel.
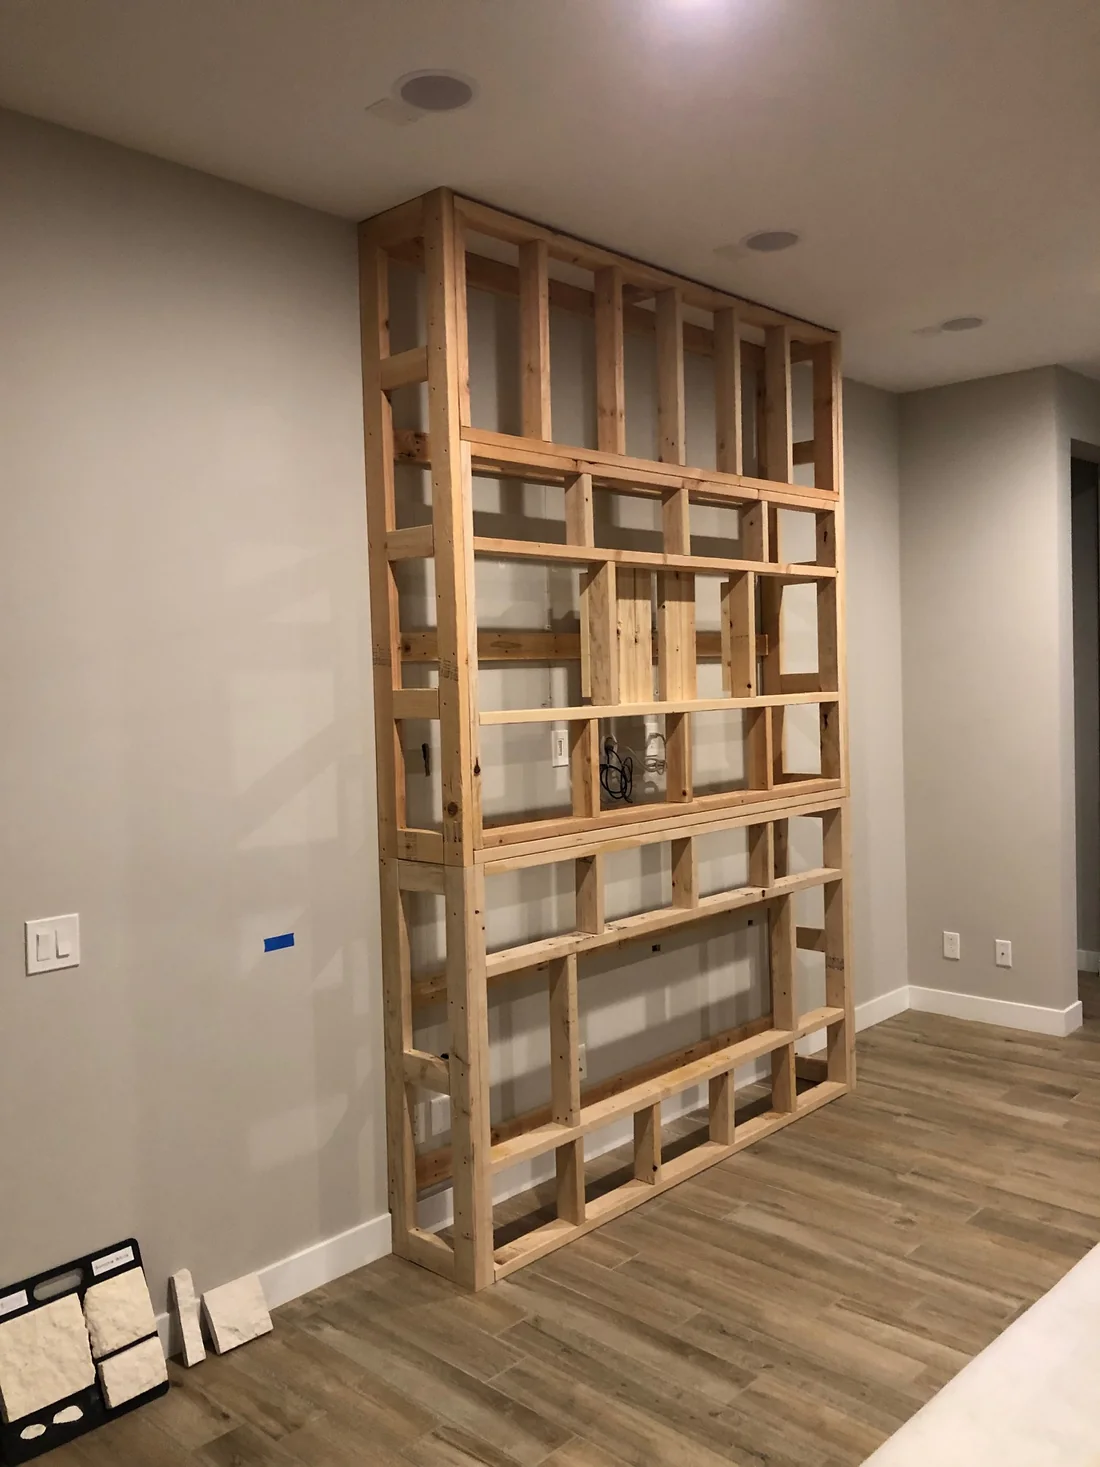
Install, Anchor and Complete the Full-Height Frame
To begin the installation process, I installed level horizontal 2x4 rails directly to the wall studs at approximately two-foot intervals. These rails gave me solid attachment points for mounting each section of the frame. I then installed and secured the individual sections to the wall, establishing the final depth and proportions of the structure. If you are incorporating a TV, give some thought to how the TV mount will be attached. I wanted the TV to appear to sit as flat as possible against the finished structure, so I left an opening for the TV mount and added extra lumber at the back of that opening to provide a strong mounting surface.
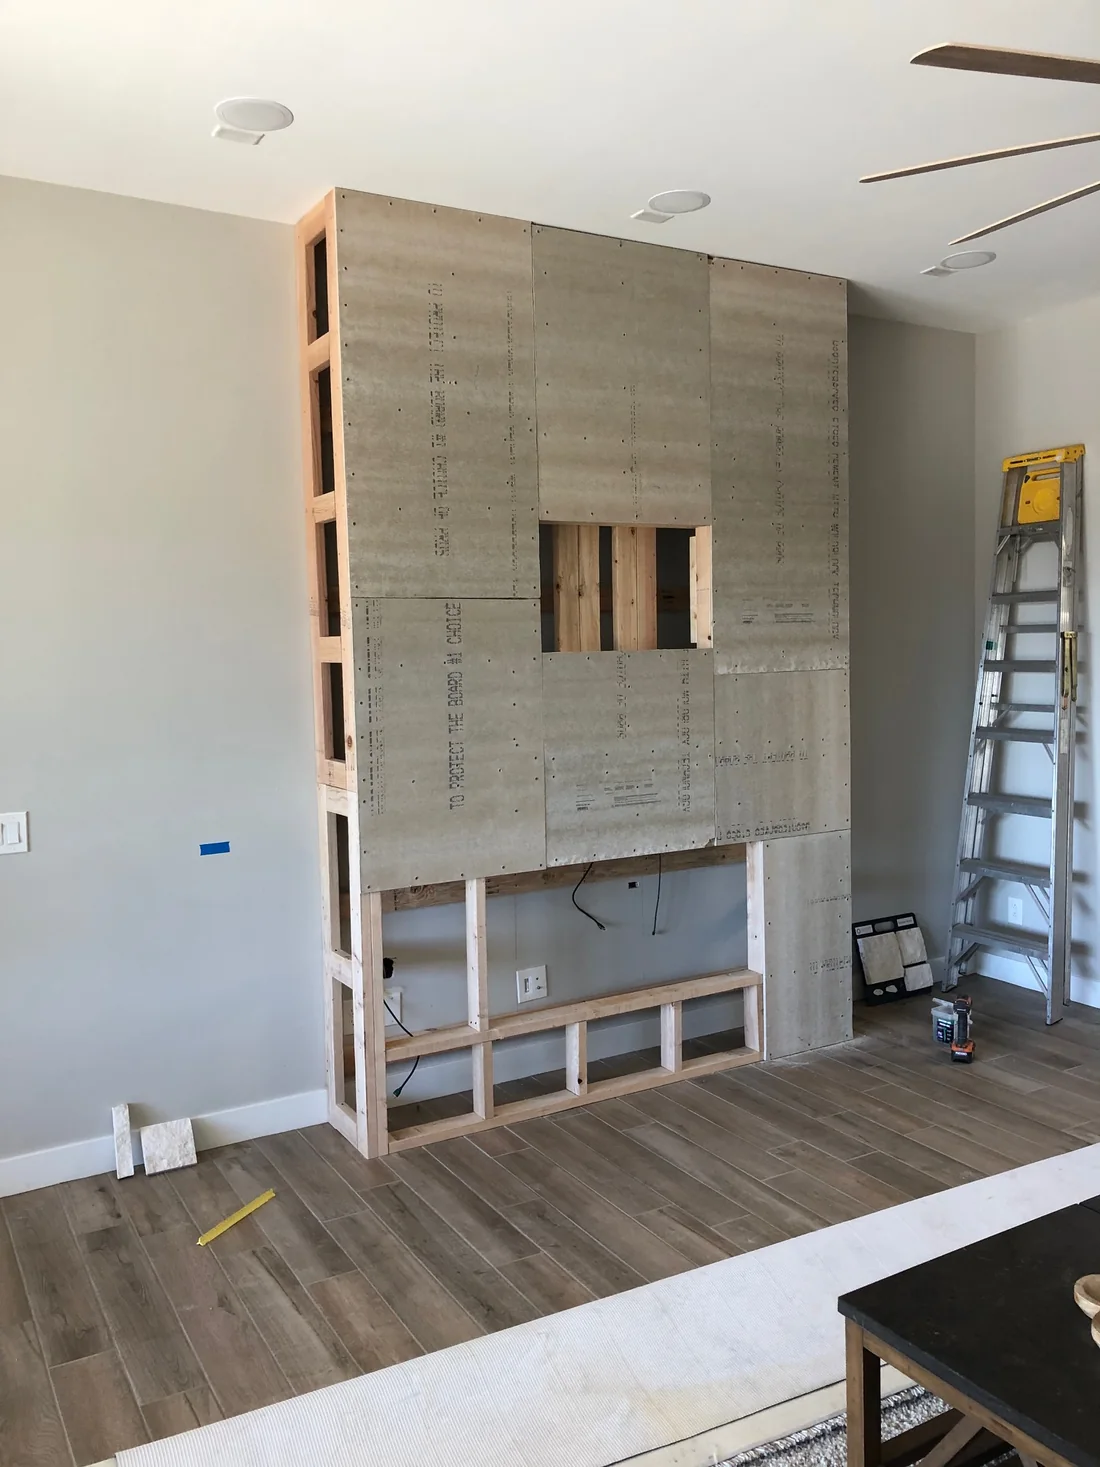
Cover the Structure and Prepare for Stone
Once installation of the frame is complete, cover the structure with 1/2-inch cement backer board. Cement board is designed for heavy-duty applications and, because we were using a heavy stone exterior, it was a much more reliable option than standard drywall. Use corrosion-resistant, alkali-coated cement board screws, such as Durock or HardieBacker screws, for installation. Stagger the seams in a running-bond pattern so continuous joints do not line up. This helps distribute the load and reduces the chance of stress cracks forming along a single line. Tape all joints with alkali-resistant mesh tape and embed the tape in thin-set mortar.

Lay Out and Install the Stone Veneer
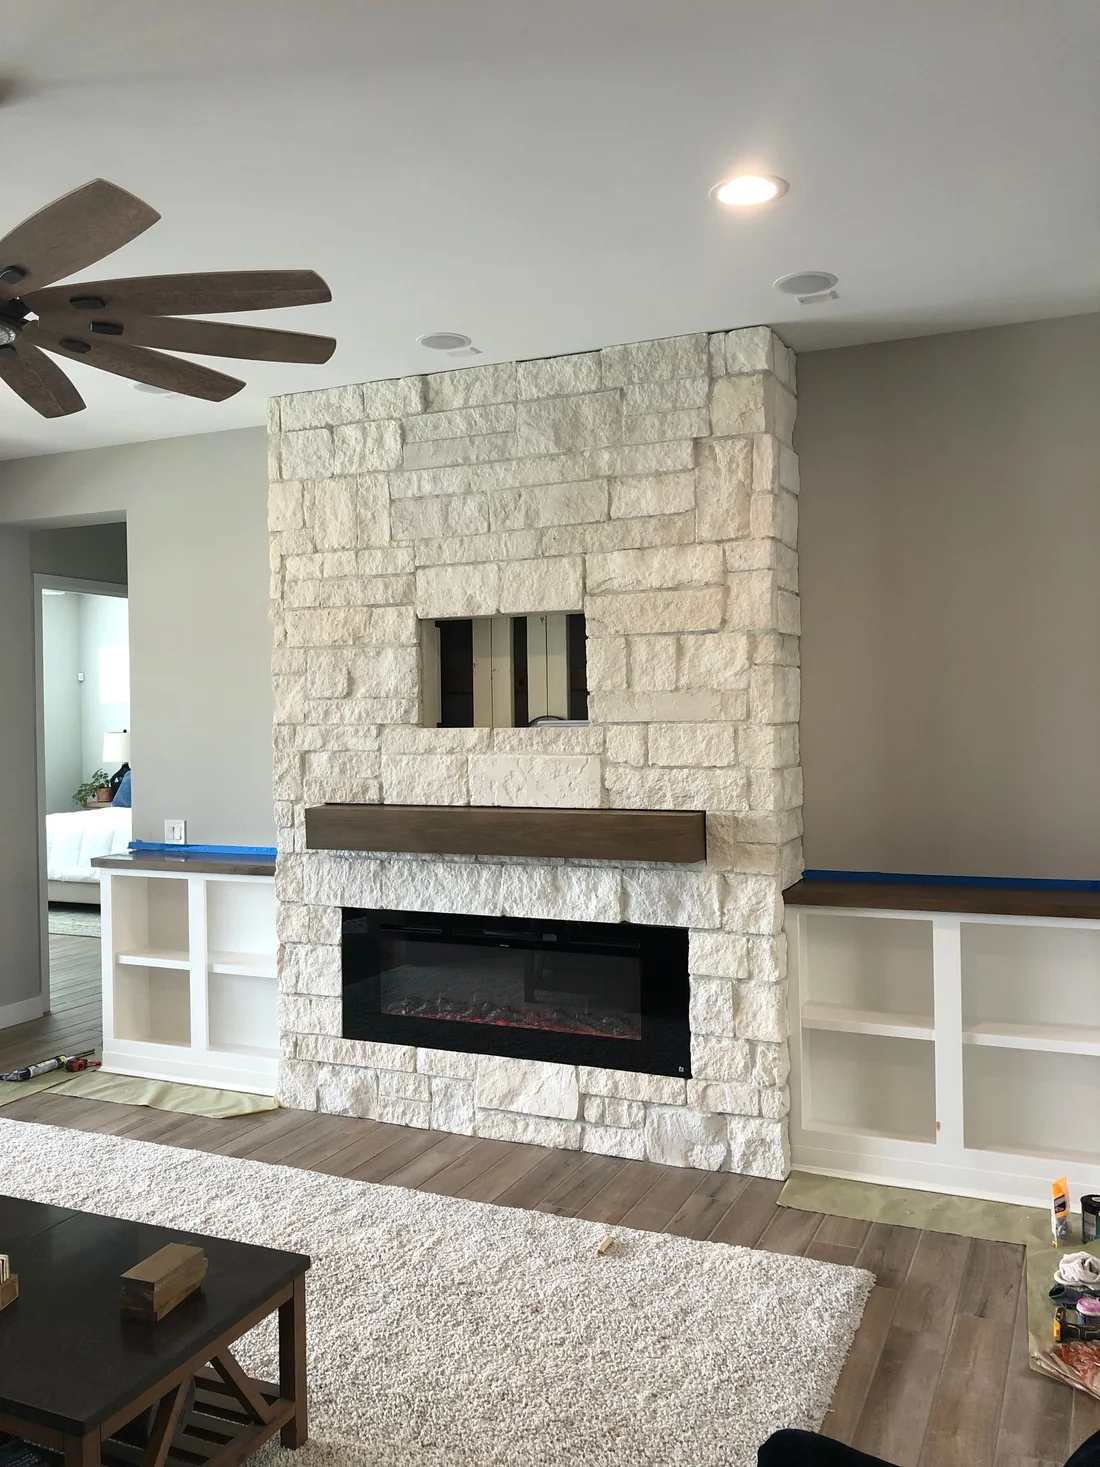
The natural Texas limestone veneer we used came in several heights—4, 6 and 10 inches—with varying lengths and shapes, along with matching corner pieces. Laying out the stone carefully is critical to avoid obvious pattern repetition and to achieve the best overall fit and appearance. This step will likely take the longest. Keep each row level, and it is generally best to begin with the corner pieces and work inward. A tile saw will be needed to trim stones where necessary. The choice of mortar is especially important when working with heavy stone. Use a Type S mortar or another product specifically rated for setting stone in a vertical application. Work one row at a time, starting at the bottom. Around the fireplace and TV openings, temporary support may be needed. In our case, a 2x4 ledge could be mounted inside the opening to support the stone while the mortar cures.
Complete the Stonework, Grout and Install the Mantel
Once the stone installation is complete, install the mantel if one is being used. In our case, the mantel was mounted to a 2x4 that was fastened through the cement board and aligned so it was firmly secured to the internal framing underneath. This should be done before any grouting begins. Our mantel was made from 3/4-inch stained birch plywood and measured about 66 inches long—just slightly wider than the TV. Any cabinets should also be installed next to the stone-covered structure at this stage. Grouting can be one of the most challenging parts of the project and is easily the messiest step, so protect the surrounding area thoroughly with tarps or drop cloths. Once the grout is mixed, load it into a grout or piping bag and begin filling the joints between the stones. We chose a heavier grout application so the joints were substantially filled.
The Finished Custom Fireplace Cabinet
We are very happy with the finished result. It is a substantial project if you are doing the work yourself. Working on it part time, the project took several weeks to complete. If you also include building the cabinets and mantel as part of the DIY work, it could easily add several more weeks. One way to shorten the timeline is to use premade cabinets with matching wood tops. Replacing the natural stone veneer with tile could also reduce the amount of labor considerably. Our total project budget was approximately $3,000.
Fireplace Project Details
- Finished structure: approximately 8 ft. wide × 10 ft. high
- Fireplace: Touchstone Home Products
- Stone: Natural Texas limestone
- Mantel: 3/4-in. birch plywood
- Frame: Standard 2×4 Douglas fir
- Approximate project cost: ± $3,000
- Approximate timeline: 3–6 weeks
Safety & Planning Note
Before beginning the project, review the installation instructions for your specific electric fireplace. Required clearances, ventilation, electrical connections, and allowable surrounding materials can vary by model. Plan the framing so the fireplace remains accessible for service and inspection, and make sure the electrical outlet or junction box can be reached after the structure is finished.
If a television is being mounted above the fireplace, verify both the fireplace manufacturer’s clearance requirements and the TV manufacturer’s installation recommendations. Pay particular attention to where the fireplace exhausts heat, since excessive heat can damage a television or other electronics.
Because stone veneer and cement board can add substantial weight, the framing should be securely fastened to the wall structure and designed to support the finished load. Mantels, TV mounts, and cabinets should also be anchored to solid framing rather than relying on finish materials alone.
For any electrical work beyond simply plugging the fireplace into an existing properly located receptacle, follow local electrical codes and use a qualified electrician when appropriate.