

Accent wall ideas do not have to depend on bold paint colors or expensive wall panels. For this completed project, I used simple 1×3 MDF strips to turn a long, otherwise plain hallway wall into a paneled feature wall. The trim and wall were painted the same color, so the effect comes from shadow lines, proportion and the grid itself rather than from a contrasting finish.
Materials
- 1×3 MDF trim
- Paintable caulk
- Nail-hole filler
- Matching wall paint
- Brad nails appropriate for the installation
Tools
- Laser level
- Brad nailer
- Tape measure
- Saw for cutting the MDF
- Caulk gun
- Putty knife or filling tool
- Painting supplies
Before You Start: Plan the Pattern
The most important part of this kind of MDF accent wall is the layout. The trim is inexpensive and the cuts are straightforward, but small spacing errors can become obvious once the pattern extends across an entire wall.
I started by deciding where the vertical pieces should land and how the pattern would work around the light switches, receptacles, baseboard and the opening at the far end of the hallway. There is no single correct spacing. The goal is to create bays that look balanced on the wall you actually have.
Step 1: Install the Vertical MDF Pieces
The first construction step was installing the 1×3 MDF strips vertically from the baseboard all the way to the ceiling. These long vertical lines establish the main rhythm of the feature wall and give you fixed reference points for every horizontal piece that follows.
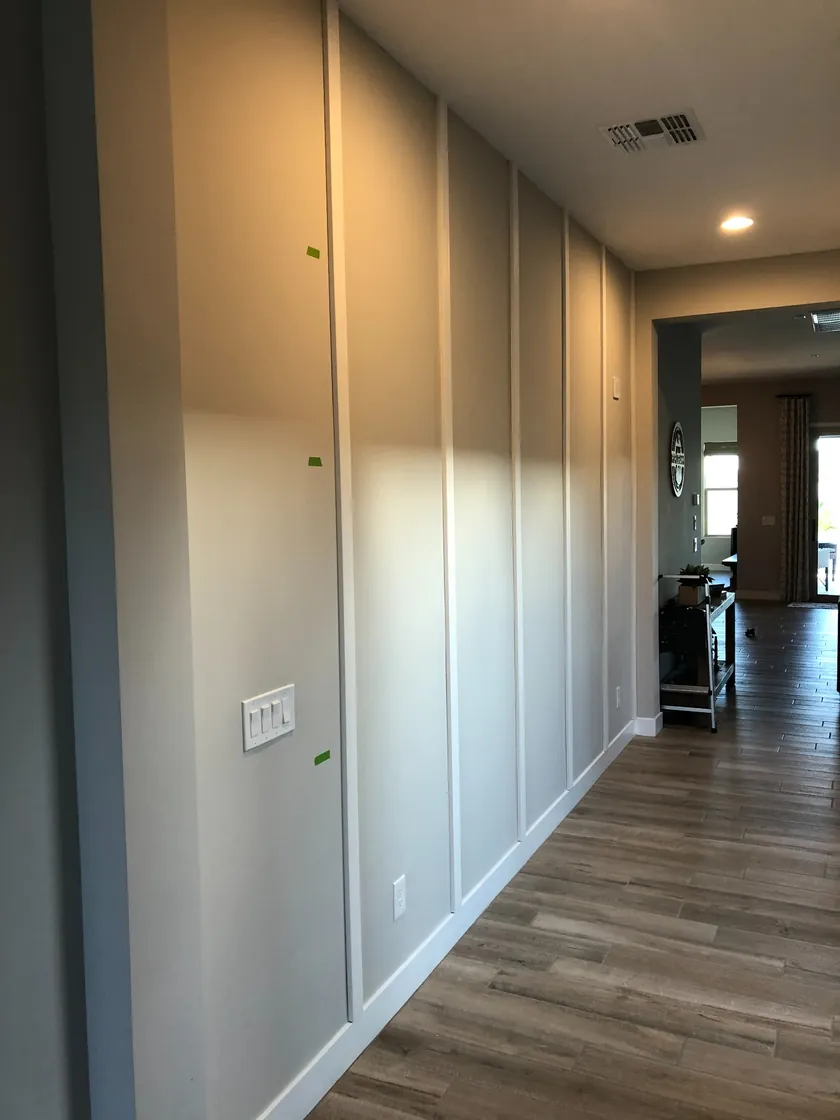
Keep checking each piece before fastening it. Walls and ceilings are not always perfectly square, so measure the actual length at each location rather than assuming every vertical strip will be identical.
Step 2: Continue the Vertical Layout Across the Wall
Once the first few pieces were in place, I continued the same spacing down the hallway. At this stage the project already started to read as an architectural wall feature even though the horizontal pieces had not been installed yet.
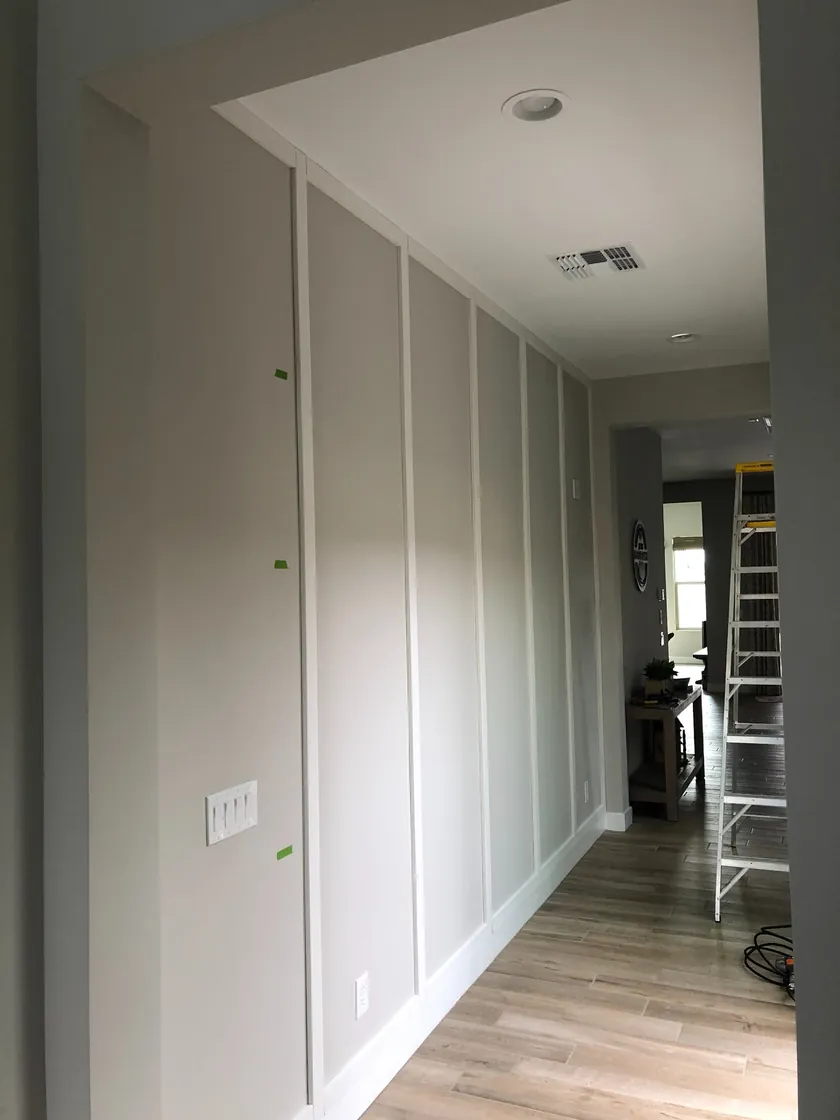
If you are fastening through drywall, use a fastening method suitable for the wall construction and catch framing where practical. The trim should sit flat against the wall before you move on to the grid.
Step 3: Start at the Top and Add the Horizontal Pieces
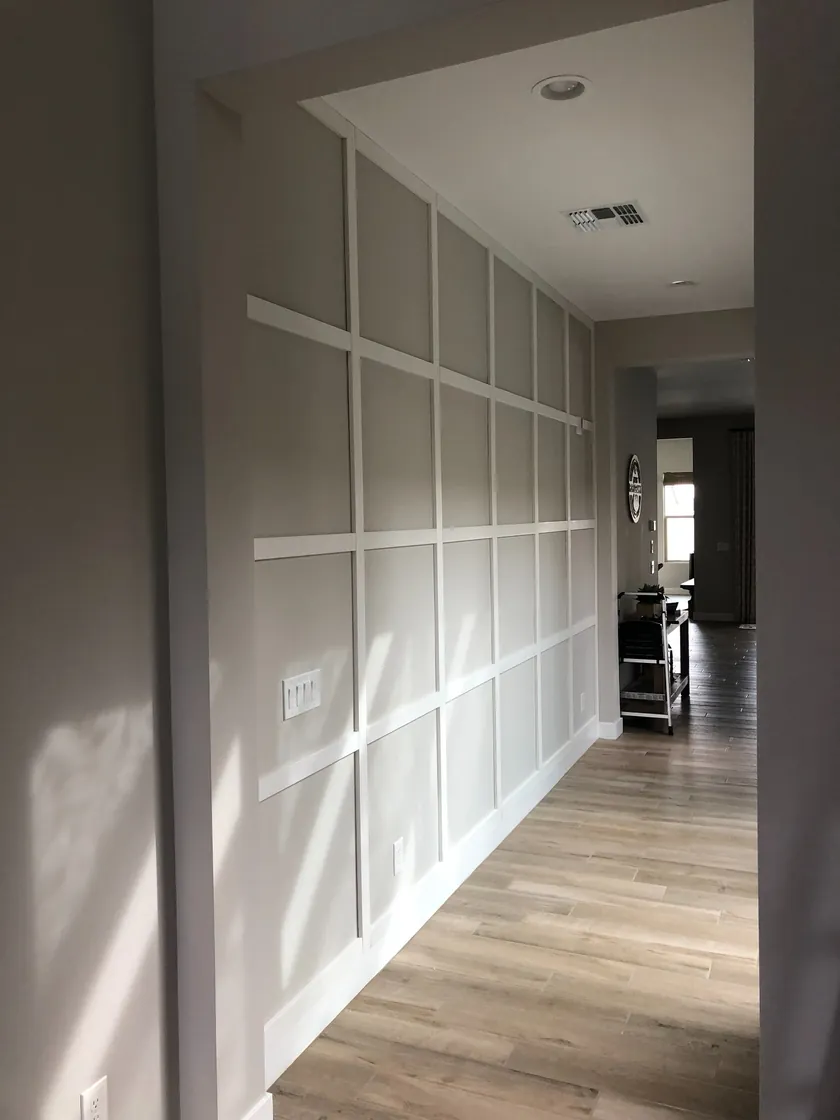
With the vertical strips finished, I started at the top of the wall and chose the spacing for the first horizontal row. A laser level made this much easier because the reference line could run across the entire wall at once.
Each horizontal piece was cut to fit between the vertical MDF strips and installed with a brad nailer. After the first row was complete, I moved the laser down to the next height and repeated the process.
Step 4: Caulk the MDF and Fill the Nail Holes
The trim installation creates the shape, but the finishing work is what makes the wall look built in. After all of the MDF was installed, I caulked around the slats where the trim met the wall and filled the visible brad-nail holes.
This step removes the small dark gaps that can make separate pieces of MDF look applied on top of the drywall. Once the caulk and filler are dry and smooth, the wall begins to read as one continuous paneled surface.
Step 5: Paint the Accent Wall and Trim the Same Color
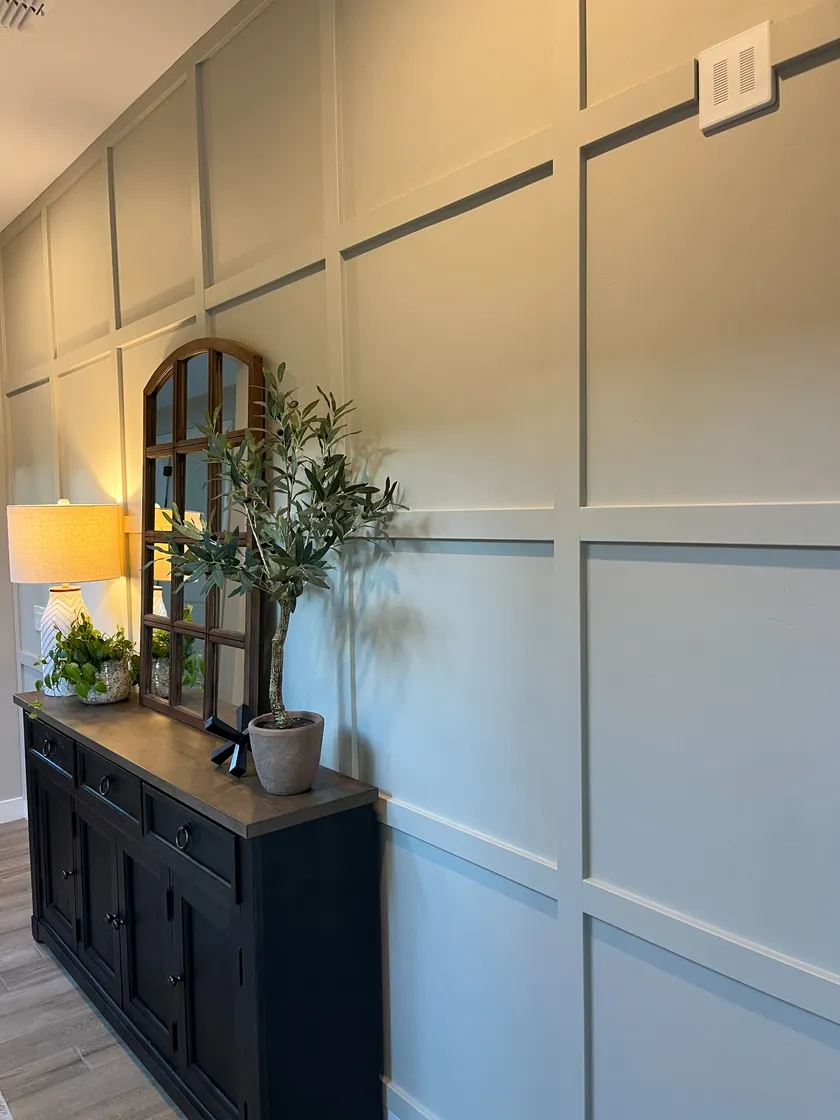
For this project I painted the MDF to match the existing wall color rather than using a contrasting accent color. That keeps the hallway quiet and lets the raised trim create the contrast through light and shadow.
This is one reason the project works well as a feature wall in a transitional space. The geometric pattern adds detail, but the single-color finish does not overwhelm the rest of the house.

Why 1×3 MDF Worked Well
MDF is straight, smooth and easy to paint, which makes it a practical choice for this kind of decorative wall treatment. The 1×3 proportion is wide enough to create visible structure without making the hallway feel heavy.
It also keeps the project simple: straight cuts, repeatable spacing and no need to create individual raised panels.
What I Would Focus on Most
- Plan the spacing before cutting.
- Keep the verticals visually straight.
- Use the laser for every horizontal row.
- Measure each opening rather than assuming equal cuts.
- Spend time on caulk and nail-hole prep.
- Use consistent paint coverage across both MDF and wall.
Is This Board-and-Batten?
People often use board and batten accent wall as a catch-all phrase for walls built with vertical and horizontal trim. Traditional board-and-batten construction is a specific siding or paneling method, while this project is better described as a geometric MDF accent wall or panel-molding feature wall. The look is similar enough that homeowners searching for board-and-batten ideas may still find the layout useful.
Accent Wall Ideas: Where This Pattern Works
This layout is not limited to a hallway. The same basic approach can work on a bedroom feature wall, behind a dining-room console, in an entry, on a stair landing or on a living-room wall where you want architectural detail without adding another paint color.
The proportions can also be changed. Fewer horizontal rows produce a taller, calmer pattern; closer spacing creates a more formal grid. The important part is making the layout respond to the dimensions of the room.
The Finished Result
The completed wall is a good example of how a relatively simple material can change the feel of a long hallway. The MDF itself is not the focal point—the repeated lines, clean joints and same-color paint are what give the wall its finished look.
For anyone collecting feature wall ideas, this is a project that can be customized without changing the basic construction method: verticals first, horizontals from the top down, laser-level alignment, then caulk, fill and paint.
As with all of our projects, don’t hesitate to reach out if you have any questions — we’re always happy to help.